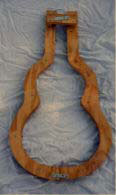
GAA's Weissenborn Guitar Project
|
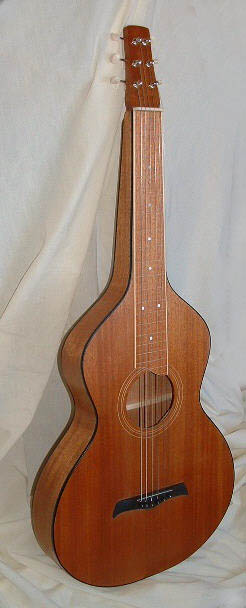
IntroductionA Weissenborn is an acoustic lap steel guitar developed in the 1920s by Hermann Weissenborn. They were designed for playing Hawaiian music. They were produced for about a decade until they were eclipsed by resonator guitars (Dobros and National steel guitars) which were louder and had more sustain. Since a Weissenborn is made to be played lap style its design is slightly different than that of a normal guitar. The two major differences are 1) the Weissenborn has a hollow neck and 2) it has a very tall nut that holds the strings high off the fretboard. This page has some pictures of a Weissenborn I built and gives some tips based on my experience (Now that I've built one I'm an expert!) |
Materials
It was tricky finding wood for a Weissenborn. The body is longer than a standard acoustic guitar and so requires larger than normal top, back and side pieces. Popular luthier supply places such as Stewart-MacDonald and Luthier Mercantile International only carry wood in standard "guitar-sized" dimensions. I ended up getting my wood from Gallery Hardwoods. Other smaller luthier wood supply places also carry a limited selection of Weissenborn-sized wood, but you have to ask.
The finished size of the top is about 31" in length and 15" at the widest point. The sides are about 39.5" long and 3" wide tapering to 1.5". For the top and bottom I started with two bookmatched sets in which each piece was 33" x 8.5". The two side pieces were each 42" x 4".
Weissenborns were traditionally built from Koa wood. This is done partially for acoustic reasons but also because Koa is a native Hawaiian wood and the instrument is designed for playing Hawaiian music. I used African Ribbon Mahogany since it is much, much cheaper and more readily available.
I used the cut off scraps from the top and back to make the fretboard, bridgeplate and the strip that goes along the seam on the back. I saved myself some grief by using scrap pieces to practice cutting the soundhole, bending the sides and applying the finish.
The fretmarkers are maple veneer. It was inexpensive and easily available from a local hardware store. For the fretboard binding I laminated the veneer to make pieces about 0.100" thick.
The bridge is carved from a block of ebony. The bridgepins and endpin are ebony. The saddle is a piece of fretwire.
Plans
I got two sets of plans - one from the MIMF and one from Stewart-MacDonald. See the Links section below for the website addresses. I figured it was cheap insurance to get both sets.
The MIMF plans are a little easier to use. It's printed on better paper and is on one compact sheet of paper rather than two sheets for the Stew-Mac plans.
My Stew-Mac plans had an error in the table of fret postitions. If you're using the Stew-Mac plans double check it before you cut your slots.
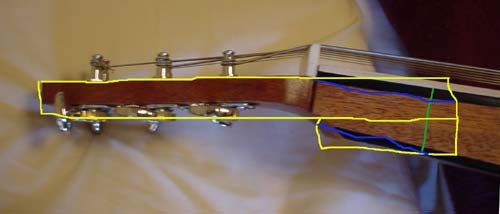
The Stew-Mac plans are also ambiguous when showing how the peghead is attached to the neck. The peghead extends into the neck about 2 inches and is the full height and width of the inside of the hollow neck. When I built mine, I didn't have a piece of wood thick enough for the neck so I stacked up two pieces of and trimmed it to the right shape. This image below illustrates the neck. The yellow lines show the outlines of the two pieces of wood that I glued together. The blue lines show how I trimmed it to match the shape of the neck. The green line shows how far it extends into the neck
.
Construction
There are no step-by-step instructions for building a Weissenborn so I followed the guitar building procedure described in Cumpiano's "Guitarmaking" book and adapted it where necessary.
Finish
The finish is nitrocellulose lacquer sprayed on from aerosol cans. Orignally I planned to use grain filler to fill the pores in the mahogany. However after comparing filled and non-filled finishes on some scraps I decided I liked the look of the unfilled mahogany. The finish isn't glassy smooth, but it has a nice deep, warm look to it. Not using grain filler also means I avoided the problem of keeping the grain filler from staining the maple veneer.
Deviations from the plans
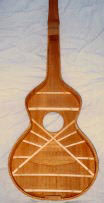
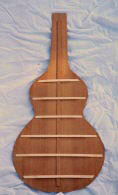
The plans show that the top and back are flat. This is what true Weissenborns have. I arched the top and back braces slightly to give it more structural strength.
I extended the braces so they go under the kerfing rather than butting against it.
Weissenborns had "rope" binding around the soundhole and the fancier models had it along the body. I don't know of a source for the rope binding so I used simple black celluloid binding around the body. Around the soundhole I routed concentric grooves and filled them with maple veneer.
That stylish curve at the end of the fretboard is not original. It is a design detail I borrowed from a Knutsen Acoustic Lap Steel.
The Case
Weissenborns have an unusual shape so I built a custom case.
The handle, latches and hinges are from Stew-Mac. The case is padded with 1" thick foam. I probably could have used 1/2" foam and made the case slightly smaller.
The covering is vinyl material (approximately 1/16" thick with a mesh backing) from a fabric store. I glued it to the wood using contact cement. If I did it over again I would use a slightly thinner and more flexible material to make the gluing easier.
Additional Pictures
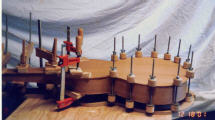
Below are some additional views of the guitar as well as shots of the bracing. Click on the images below for a larger view.
 |
 |
 |
 |
 |
Weissenborn Links
- The book Chris Knutsen: From Harp Guitars to the New Hawaiian Family by Noe and Most is an excellent resource for Weissenborn builders (you might not guess it from the title). It's full of pictures, historical information and measurements of Knutsen and Weissenborn guitars.
- The Knutsen Archives is a huge site dedicated to Knutsen instruments.
Lutherie Links
- Another French luthier with a webpage showing the construction of a Weissenborn copy. His approach relies more heavily on the use of a mold.
- The book Guitarmaking: Tradition and Technology by Cumpiano and Natelson is an essential resource for anyone building an acoustic guitar.
- I got most of my part from Stewart MacDonald Guitar Supplies.
- If you're interested in building instruments, visit the Musical Instrument Makers Forum (MIMF). It's a valuable source of information and advice. If it weren't for the MIMF I never would have attempted building a Weissenborn and it wouldn't have turned out as well as it did.
Instructional Links
You can play any style of music on a Weissenborn. In some ways it is better suited for playing solo. If you're playing in a group situation, resophonic lap steels are a better choice because they are louder. Many people use an Open D tuning on a Weissenborn. Here are instructional links for acoustic lap steel using the Open D tuning.
- Acoustic Guitar magazine had a very good online lesson by Kelly Joe Phelps. It is no longer on the website. Fortunately there is a copy on archive.org. Example 3 is a nice arrangement of "Red River Valley".
- Homespun Tapes has two acoustic lap steel instructional videos. Lap Steel Blues for the Solo Player by Mary Flowers is a good introduction to Open D tuning. The Slide Guitar of Kelly Joe Phelps is a very good video by Kelly Joe Phelps focusing on his tunes and his playing style.
Feel free to contact me if you have any comments. Visit my home page for other instrument building and Hawaiian guitar pages.
visits since April 24, 2002
Updates:
04/15/02 - Initial version
05/27/02 - Replaced some of the pictures. Added a description of the case.
09/09/02 - Added link to reviews of instructional materials and CDs
11/23/02 - Added note about the unavailability of MIMF plans
07/02/03 - Added link to Silent Dobro page
01/06/04 - Removed reference to "Waikiki..." CD
04/14/04 - Added link to Knutsen Archive
08/05/04 - Added head detail and comment about Stew-Mac plans. Moved MIMF plan errata to separate page
08/06/04 - Added link to Acoustic Guitar Weissenborn article. Corrected the link to the Knutsen Archives
03/03/05 - Added note about the availability of corrected MIMF plans
04/11/05 - Added link to C6 learning guide
09/21/05 - Added links to Weissenborn construction photos and photos of Weissenborn models
02/01/06 - Added links to www.grellier.fr
03/27/06 - Moved to new server. Added link to home page.
04/04/06 - Added instructional links.
03/08/07 - Corrected broken links.
08/06/07 - Corrected broken links.
03/24/08 - Corrected broken links.
12/31/10 - Corrected broken links.
